How to draw an Owl easily with step by step guide
How to draw an Owl easily with step by step guide
Drawing an owl is easy, very easy. We will start with two circles and you will see how easily we will convert those two circles into an owl. This technique of drawing an owl is mainly for kids but anyone can follow these easy steps to draw an owl.
First, watch the video above to get an idea. Note, that the number of steps to draw an owl in the video is just 7. But here we will further sub-divide some of the steps to make the owl drawing process easier.
No more lectures, let us learn the easiest way to draw an owl with step by step guide.
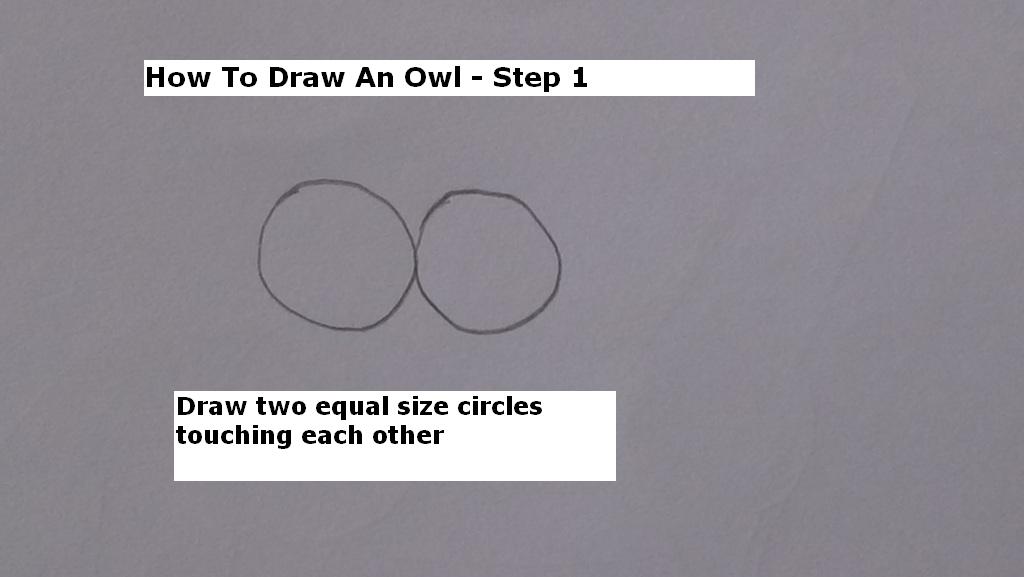
Step 1:
Draw two circles of same size. Make sure that the circles touch each other and they are in the same horizontal level. Refer to Picture 1. You can take help of a pencil compass to draw the circles but I will recommend you to draw the circles in free-hand.
Picture 1
Picture 1
Step 2:
Draw the head and ears of the owl as shown in the picture. Refer to Picture 2.
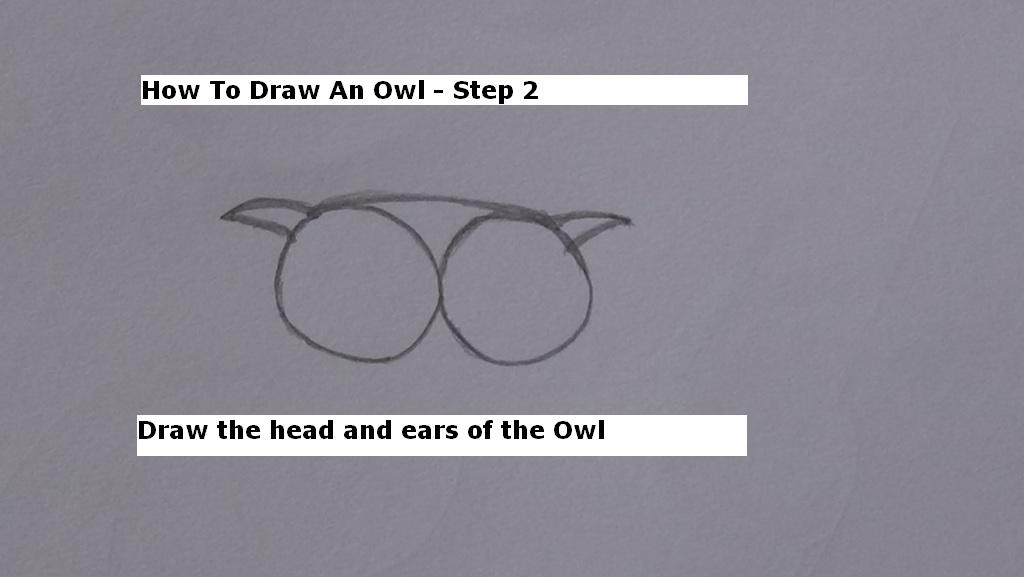
Picture 2
Step 3:
Now, draw the body of the owl as shown in the picture. Refer to Picture 3.
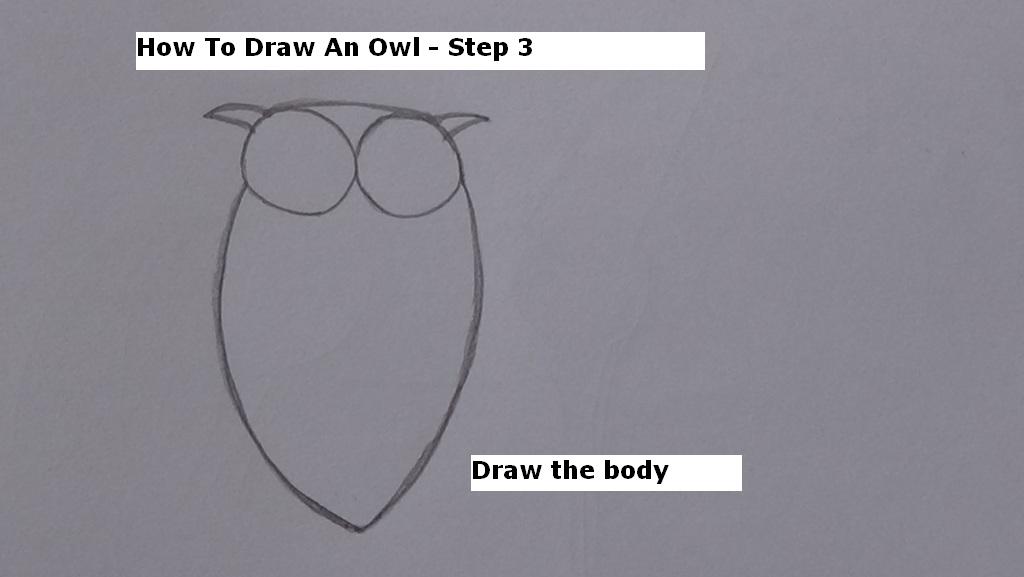
Picture 3
Step 4:
Draw the eyes of the owl as shown in the picture. Refer to Picture 4. First the outer circle of the eye. Then draw a smaller inner circle. Thicken the periphery of the inner circle. Watch the corresponding section of the video.
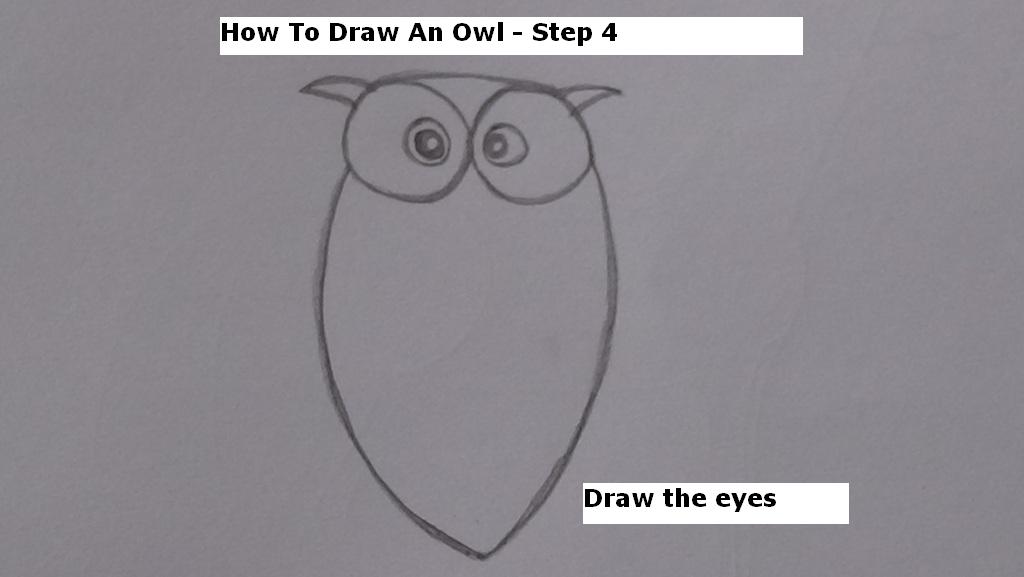
Picture 4
Step 5:
Draw the nose of the Owl as shown in the picture below. Refer to Picture 5.
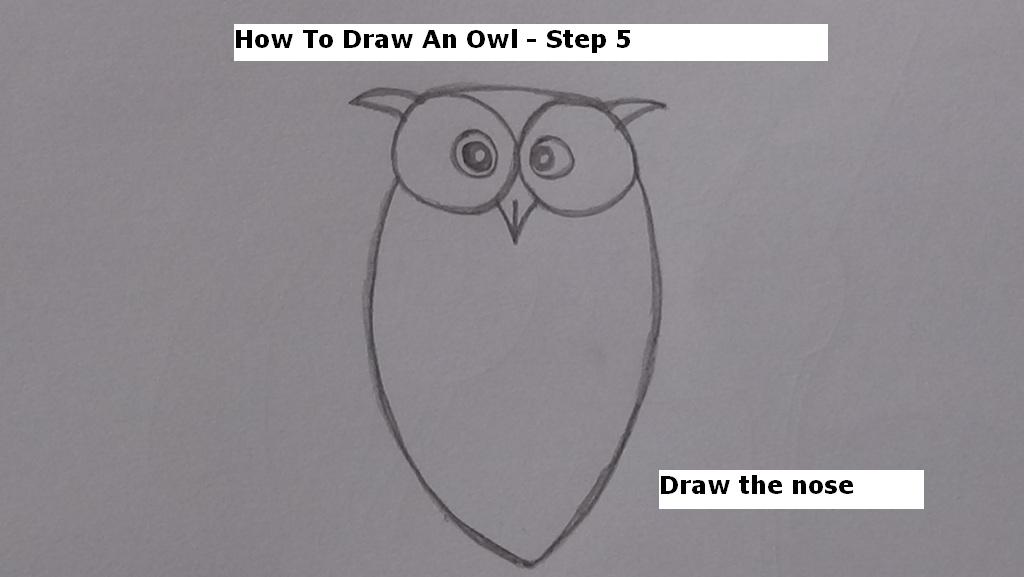
Picture 5
Step 6:
Draw the tail of the owl as shown in the picture below. Refer to Picture 6.
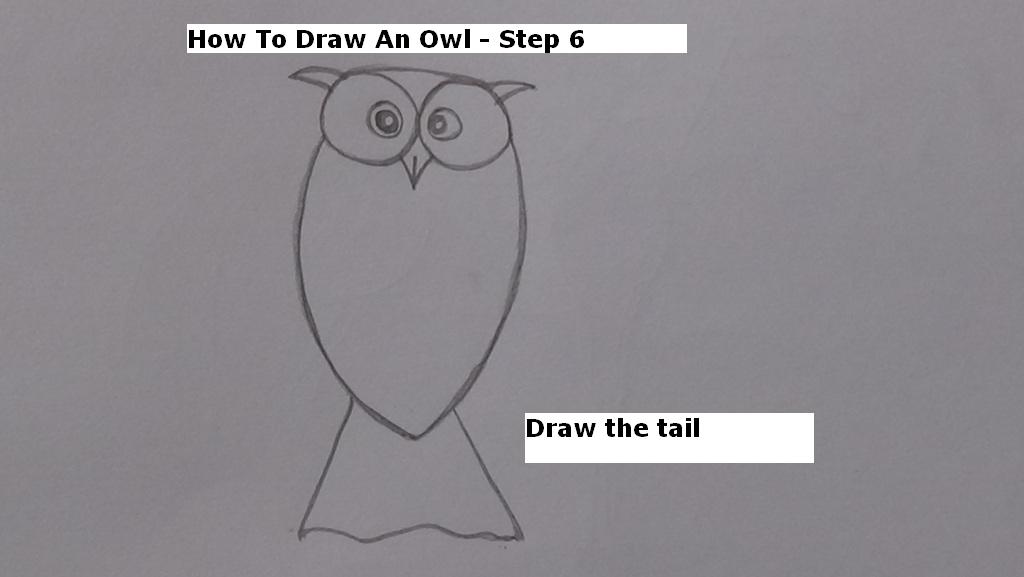
Picture 6
Step 7:
Draw the wings of the Owl. Refer to Picture 7.
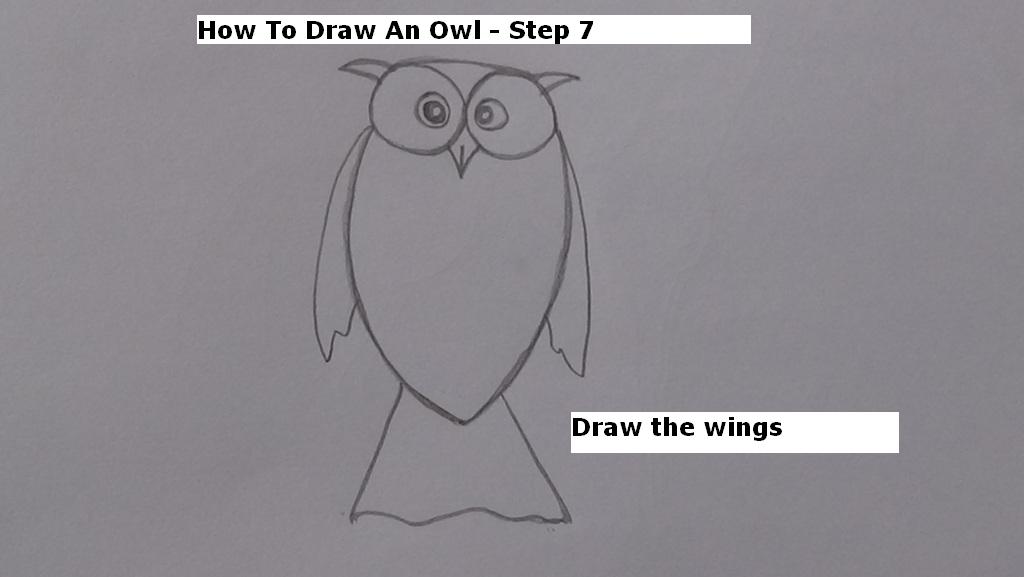
Picture 7
Step 8:
Our owl will be perching on a branch of a tree. So draw a branch. Make the branch little inclined, not horizontal. That will look better. Refer to Picture 8.
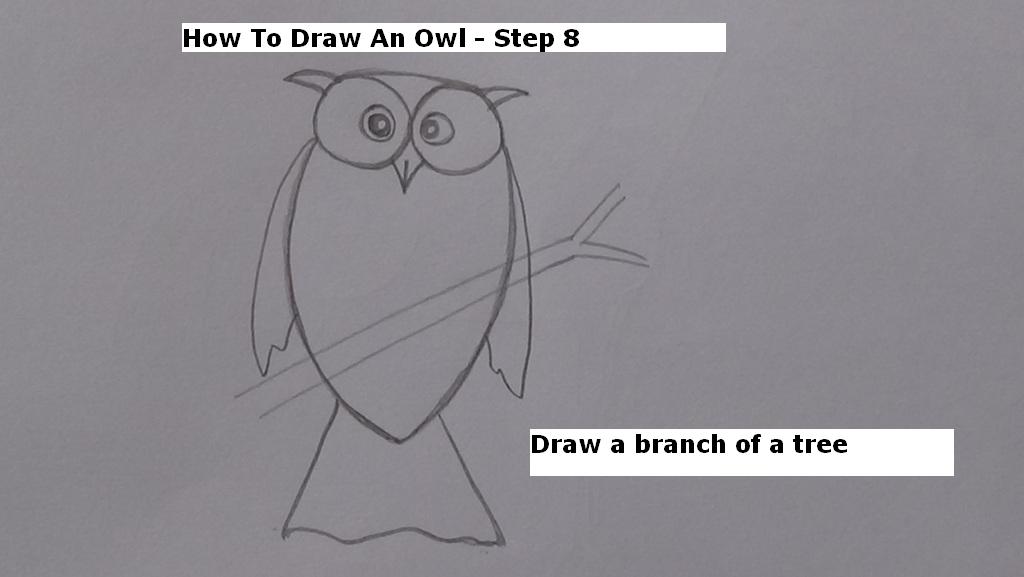
Picture 8
Step 9:
Now, draw the talons i.e. the claws of the owl. Refer to Picture 9 below.
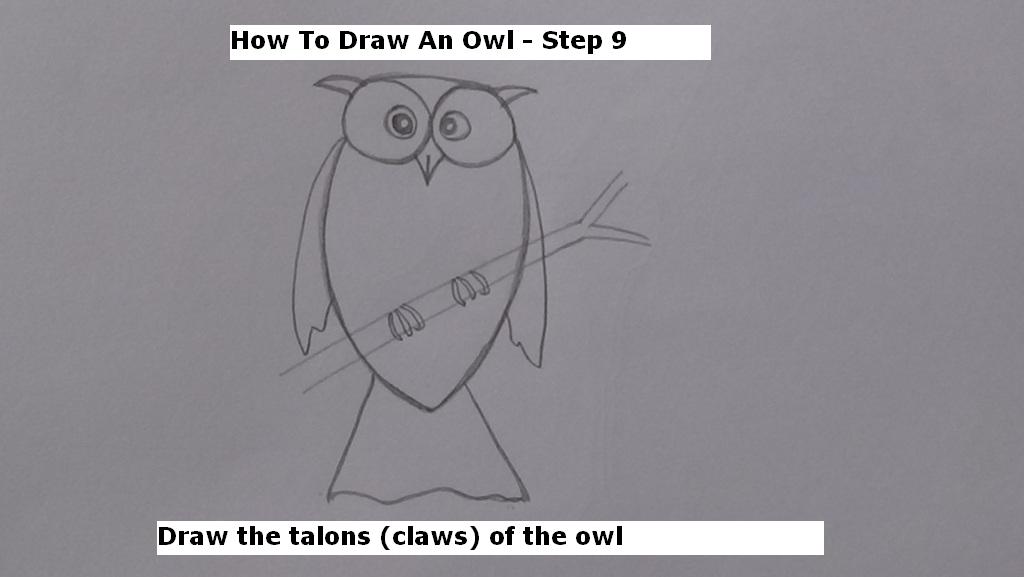
Picture 9
Step 10:
As the owl is perching on the branch so it will hide part of the body and wings of the owl. So, erase the lines as shown in the picture. Refer to Picture 10.
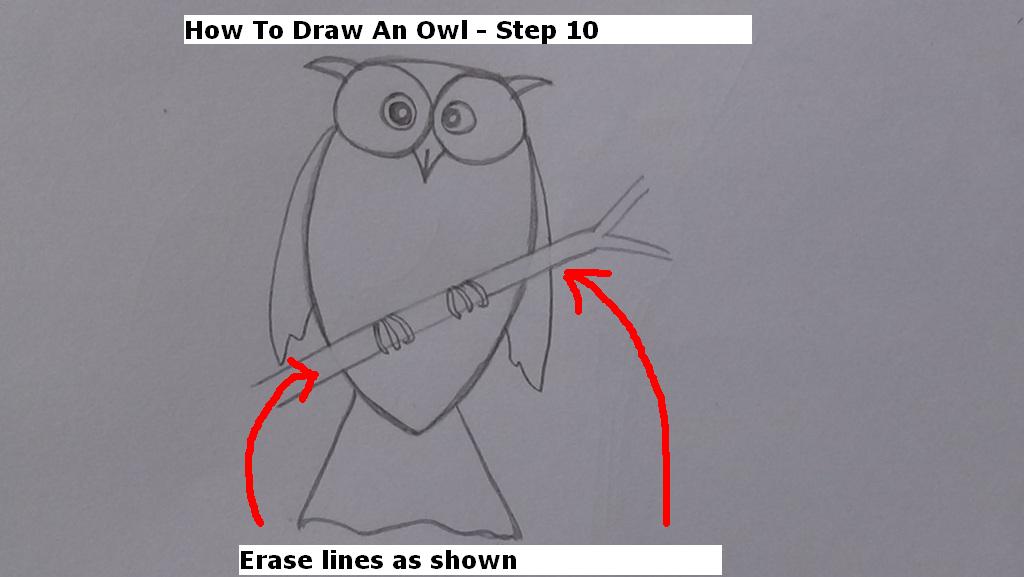
Picture 10
Step 11:
Now shade the wings and the tail of the owl as shown in the picture below. Refer to Picture 11.
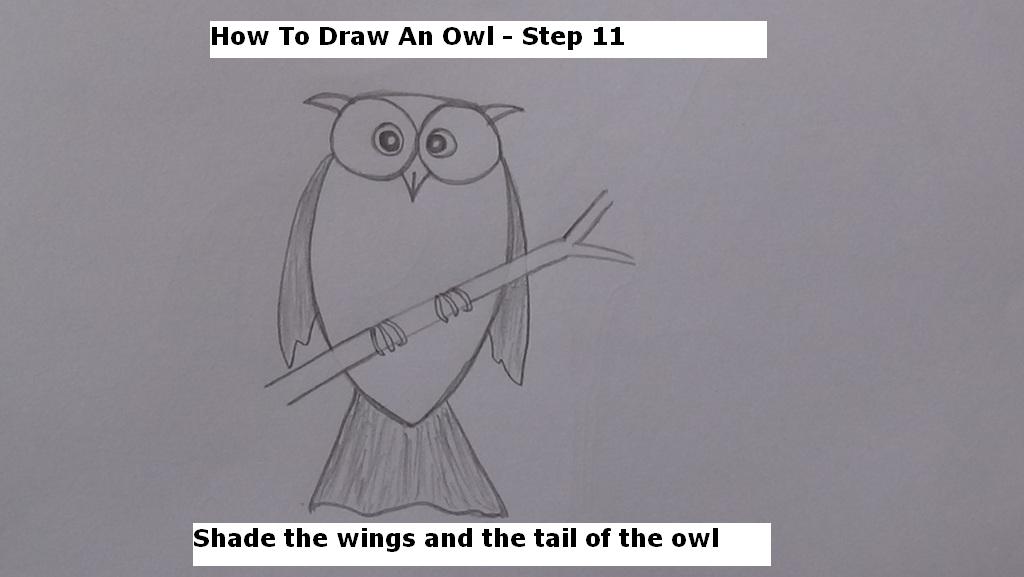
Picture 11
That’s all. We have so easily drawn an owl. Is it difficult? You just practice it a few times and you will definitely stun your friends in the school. I have practiced drawing owls and see what a nice picture I have got.
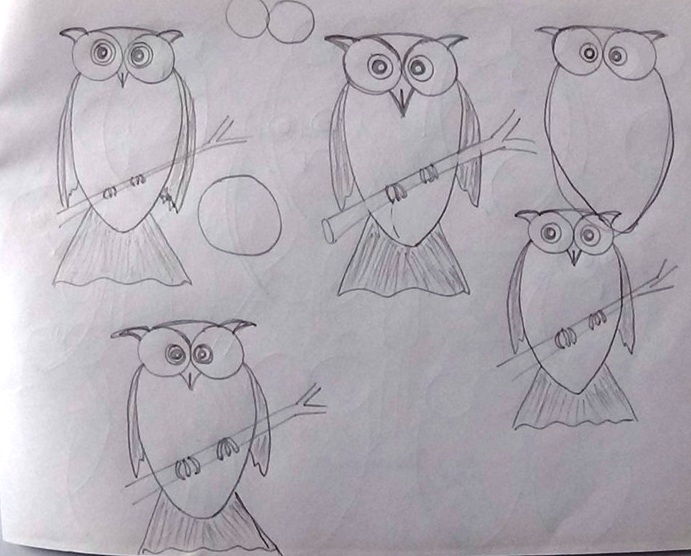
I have used 4B pencil for drawing the owl. You may use 4B or 2B penclils.
Happy Owl Drawing!
 – লাদাখ ভ্রমণের পারমিট – লাদাখ ভ্রমণের গাড়ি – লাদাখের গ্রূপ ট্যুর")
 – #লাদাখের_কোন_পাস_কখন_খোলে_কখন_বন্ধ_হয় ?")